Sales PoS
Sales PoS module allows you to make quick sales records, ideally in a store checkout station. To open the PoS screen, click on the POS button from the top left menu.
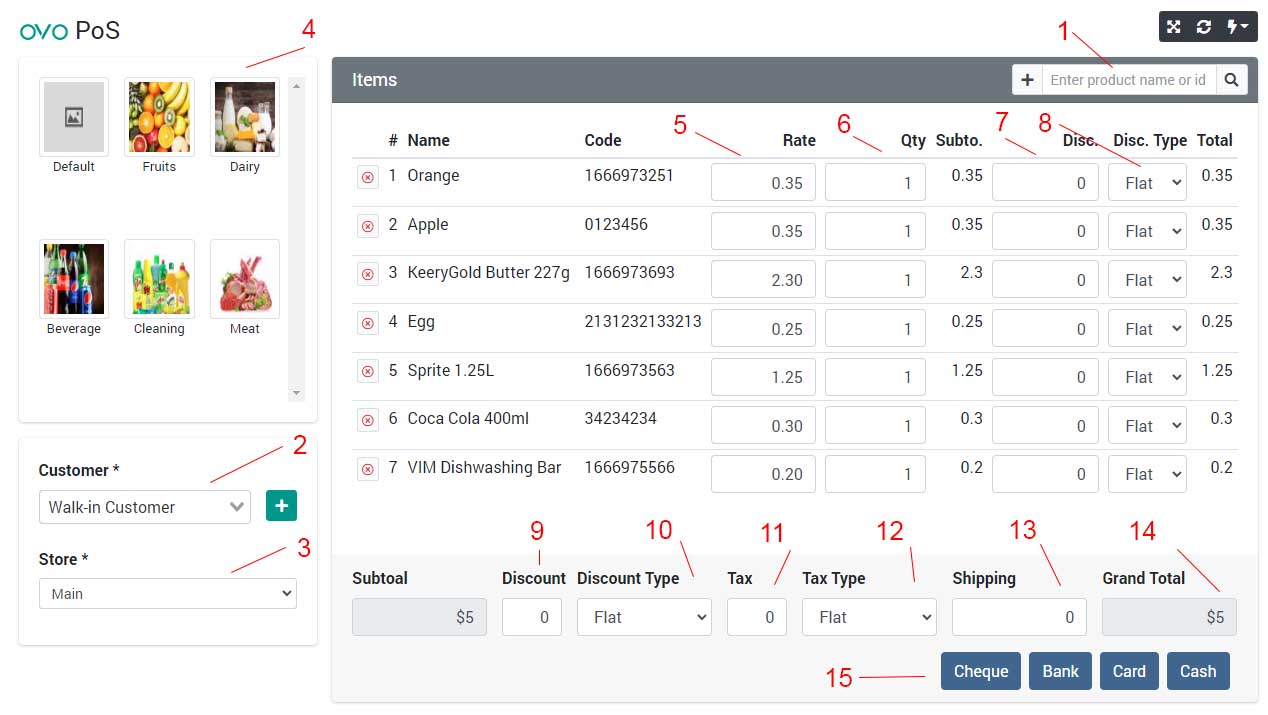
In the following section, we will discuss important parts of the PoS screen marked with red numbers and describe how to use them:
- Product Search: This field is focused by default when you first load the PoS screen or right after you successfully save a PoS sale. If you have a barcode reader machine, you can fire that on your product and the number fetched from that machine will be typed out in this field and if it matches a product, it will add the product in the Items list below.
- Customer: Select or search for the customer of the sale. Walk-in Customer is selected by default which is ideal for PoS sales.
- Store: The store where the current sale is being recorded. The default is the Main store or the store of the current user.
- Product Category: List of product categories. If you click on any of the category, products from that category will be displayed. You can click on listed products to add 1 1uantity of that product directly in the Items list.
- Rate: The sell rate of the product of that row. It is fetched from the settings page of a specific product. You can change it here for this specific sale only.
- Qty: Quantity of a product that is being sold.
- Item Discount: The amount or percentage of discount you are giving for a specific product.
- Item Discount Type: Type of discount your are giving to a specific product, flat amount or percentage.
- Discount: This is the discount amount your are giving to your customer for the entire sale. It can be flat amount or percentage.
- Discount Type: Type for the discount set on point 9. it can be flat or percentage.
- Tax: The tax amount or percentage for the sale.
- Tax Type: Type for the Tax set on point 11. It can flat or percentage.
- Shipping: The cost of shipping the sale items. It usually stays zero for a PoS sale.
- Grand Total: This is the amount to be paid by the customer.
- Payment Method: Select a payment method for the sale. Selecting cash will directly save the sale. Selecting Card/Bank/Cheque will display a popup to enter additional details of the payment.
After saving a sale, it will prompt to print the invoice and the PoS screen will be reset and ready for a new sale. The print will appear as selected in the Setting section of the app (Thermal or Normal print).